How to create animations in Microsoft PowerPoint
Making your PowerPoint presentation visually engaging is important to keep your audience interested in your slides. You can animate text, shapes, pictures, tables and more. In this blog we’ll explain how to create animations in Microsoft PowerPoint using both Windows and Mac devices.

Important: Participoll uses animations to run effectively. If you’re using animations in PowerPoint as well as Participoll, please ensure you reorder your animations to put Participoll at the end of the sequence.
How to create animations in PowerPoint (Windows)
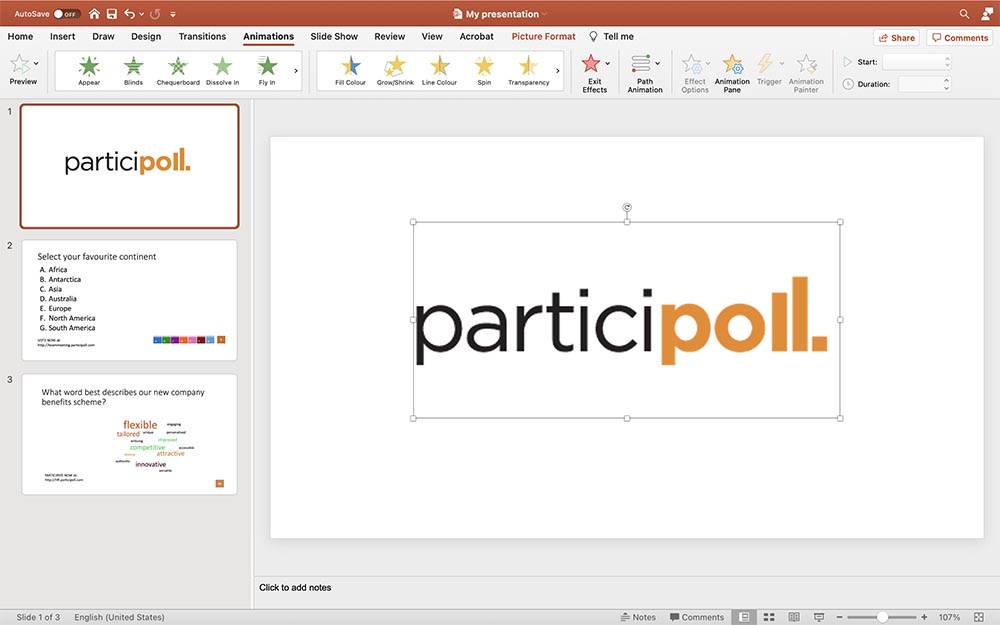
1. First, select the object that you want to animate in your presentation and click on the Animations tab. We’ve selected the Participoll logo.
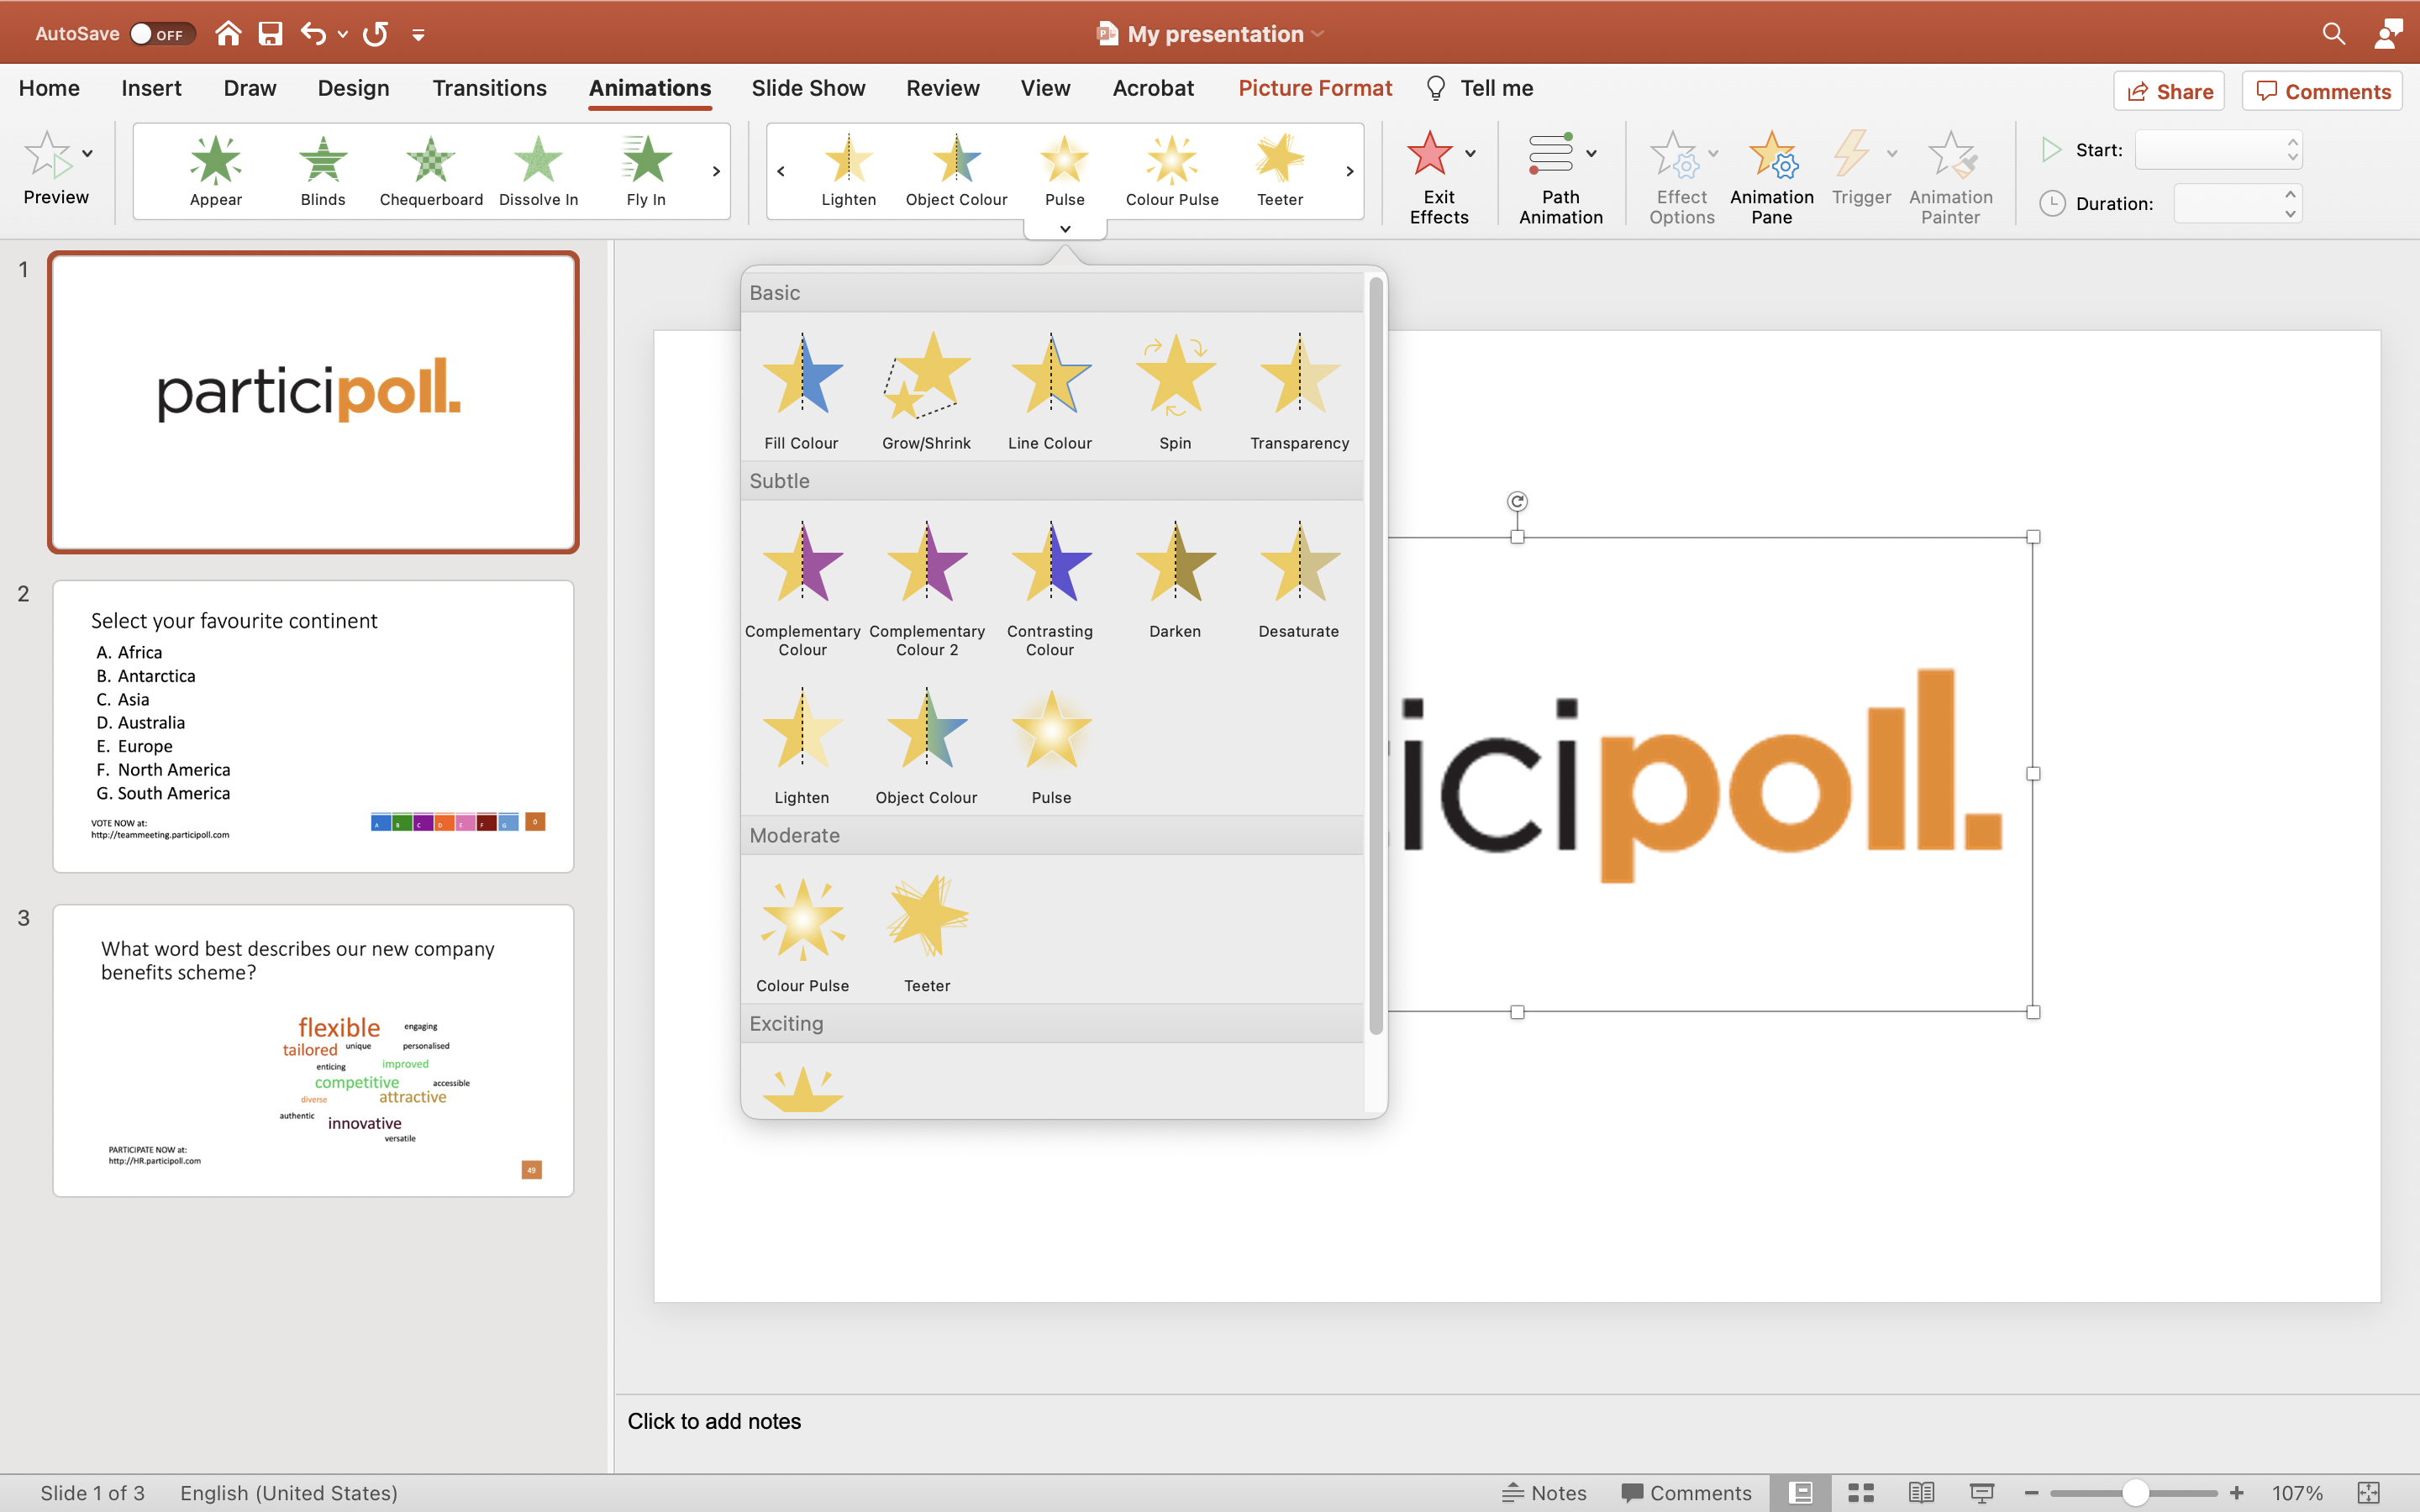
2. In the Animations tab, you’ll see a row of animations (shown as stars) you can use. Click on the down arrow next to them to see all the options available.
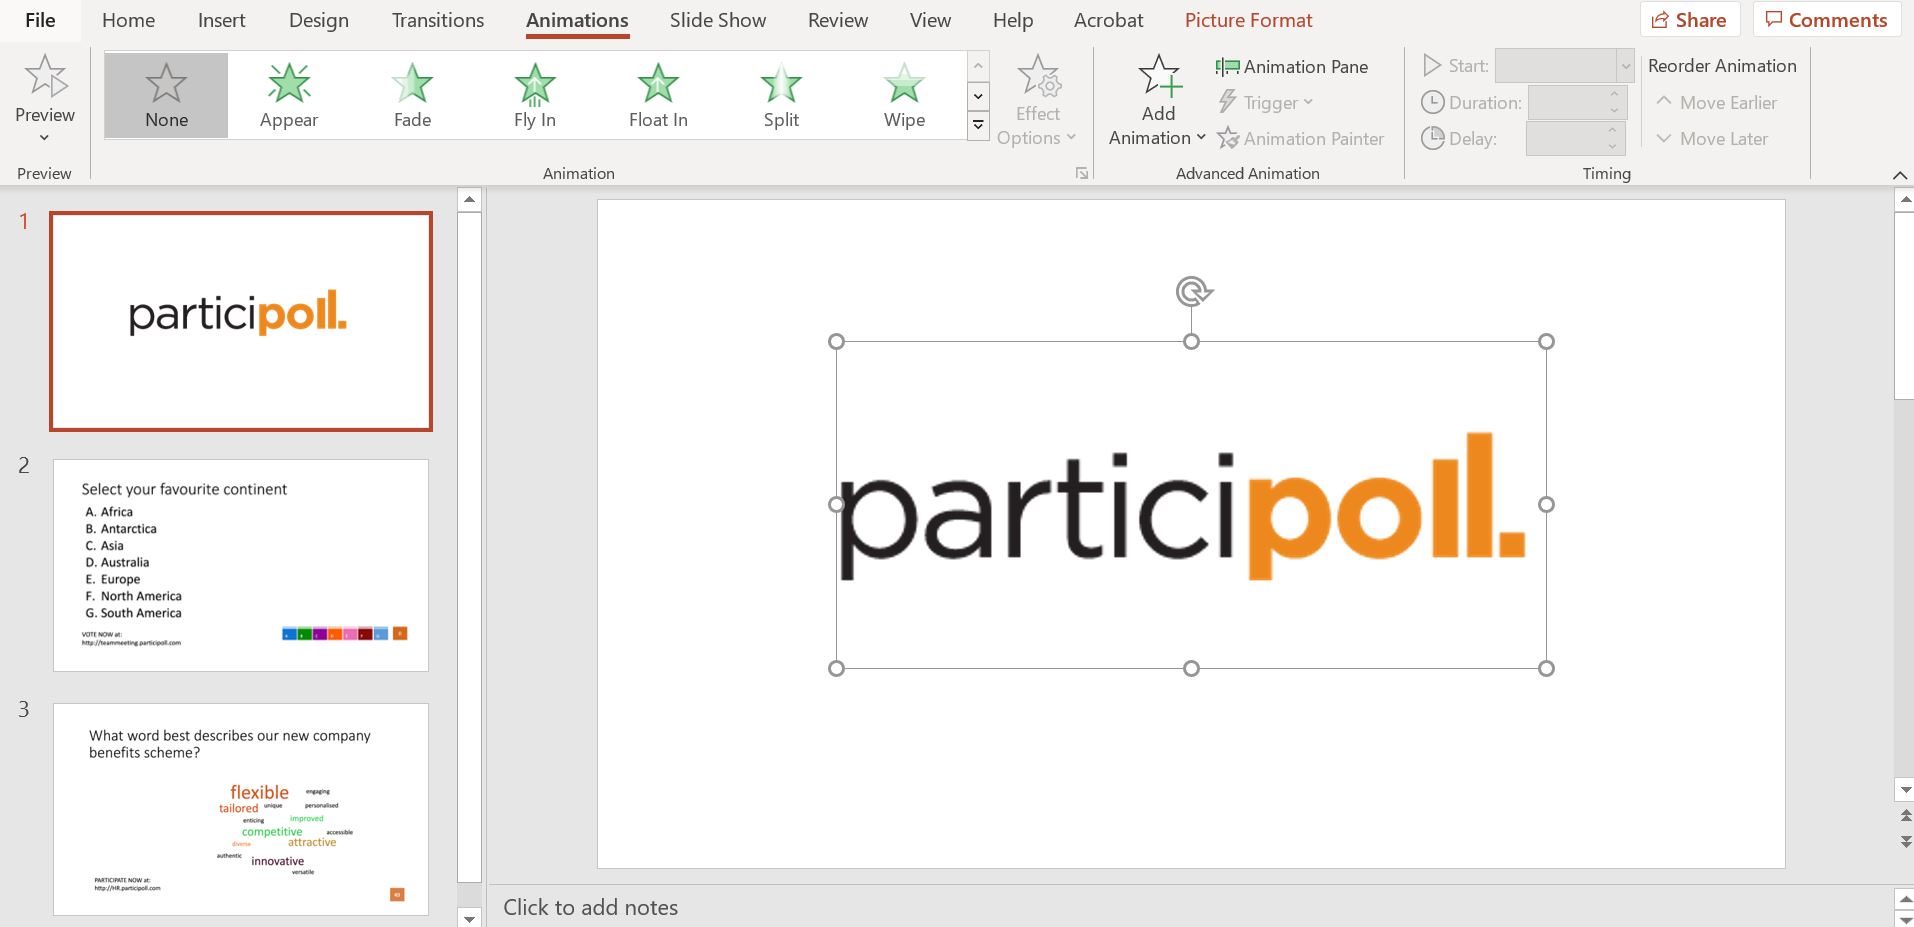
Alternatively, you can also click the Add Animation button and choose your animation from there. Click an animation to apply it to your selected object.
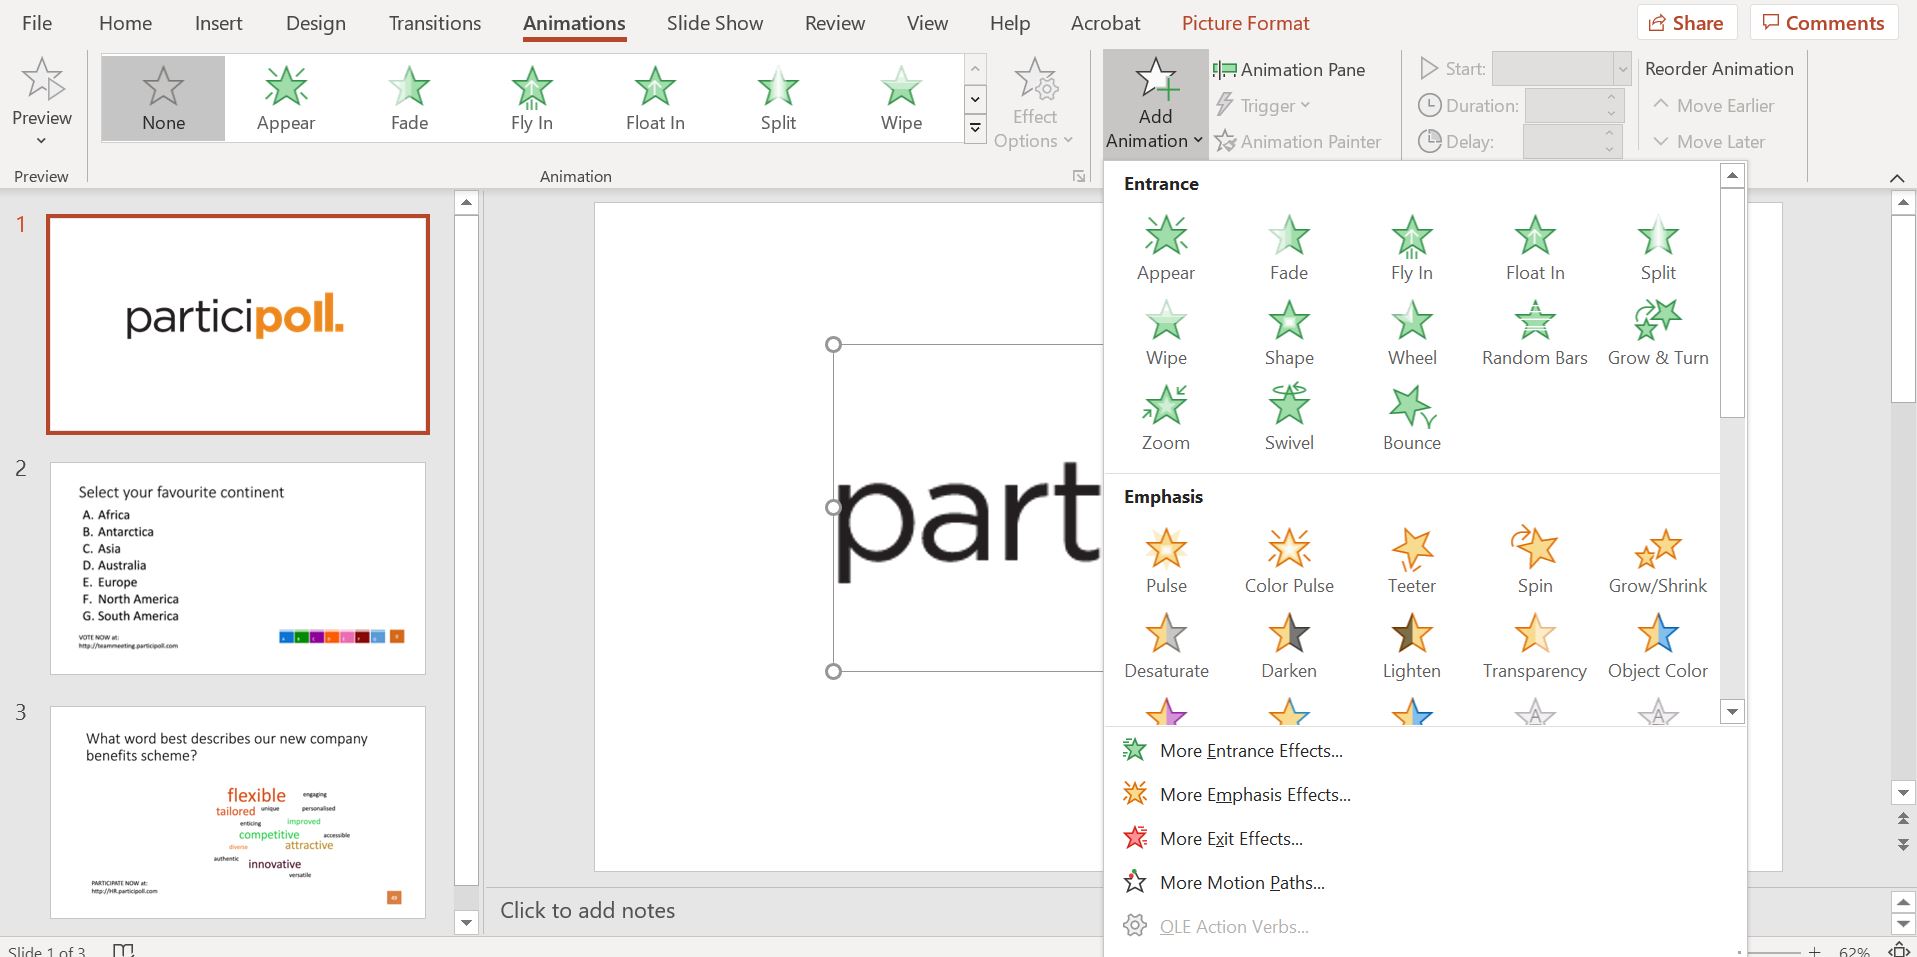
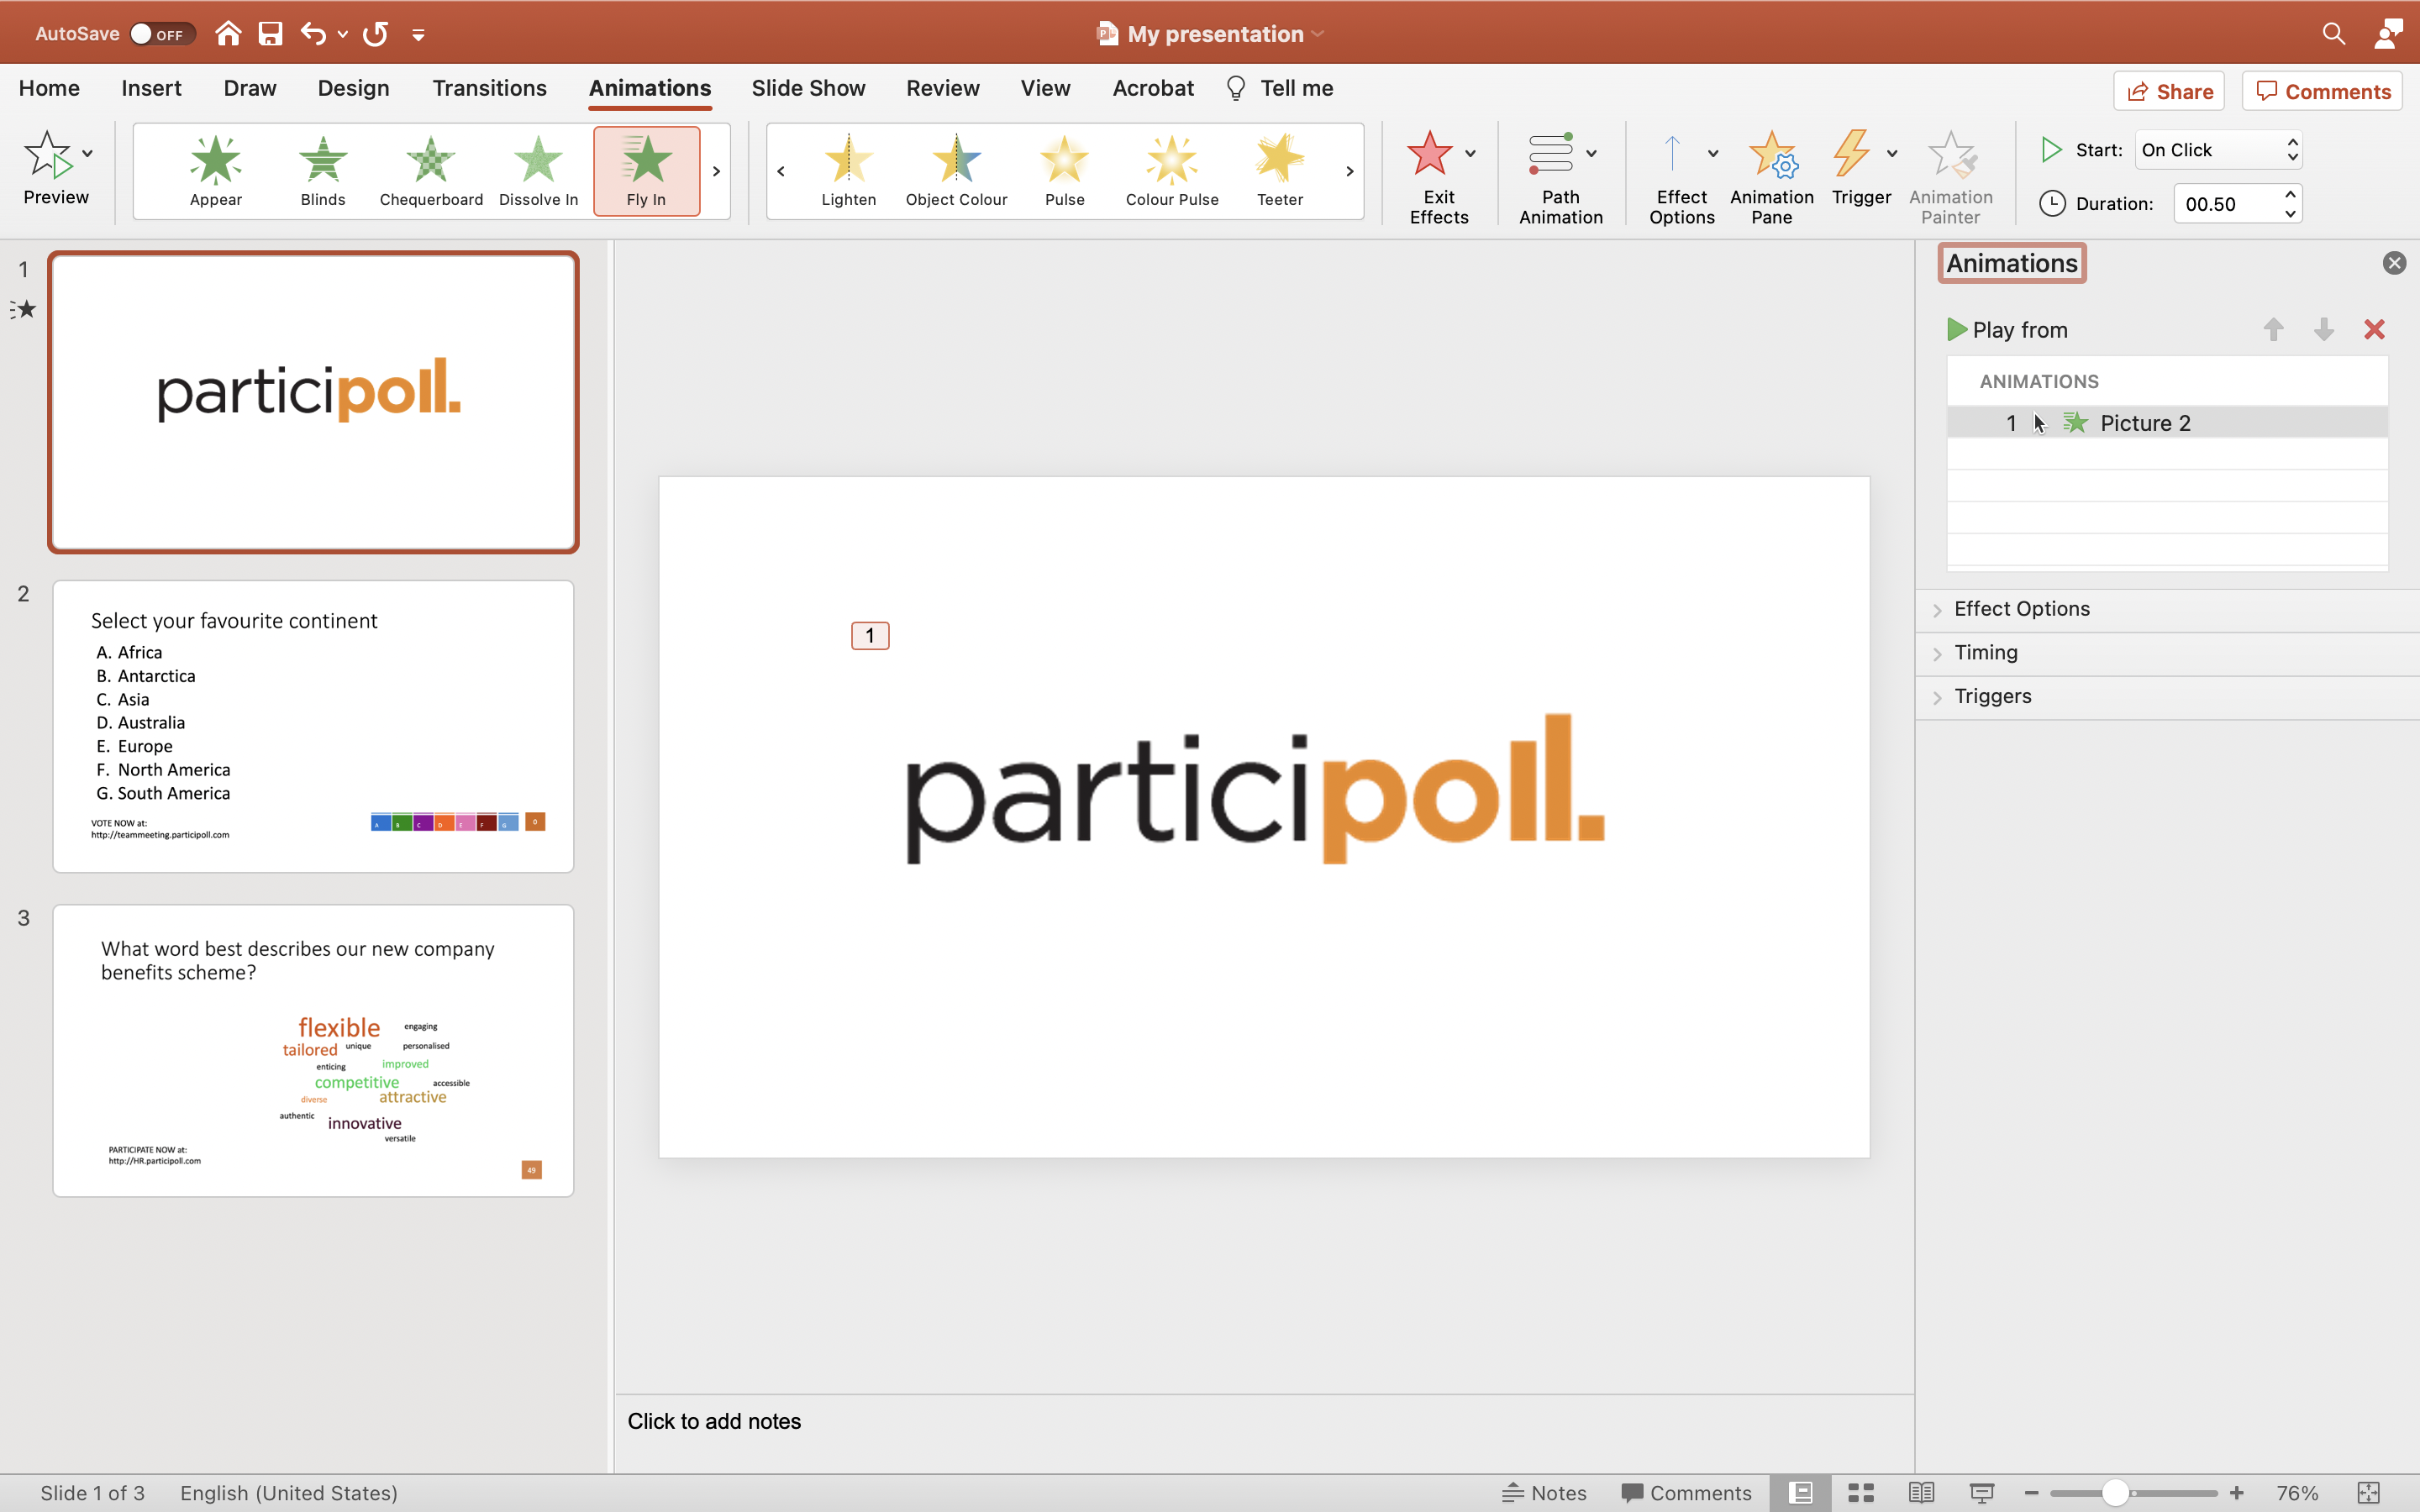
3. When you have selected your animation, click on the Animation Pane button to customise your animation. This is next to the Add Animation button (see above screenshot).
4. In the Animation Pane, you’ll see a list of animations you’ve applied to your selected object. To customise them individually, click the down arrow next to the animation. If you have more than one animation applied, you can also reorder them here.
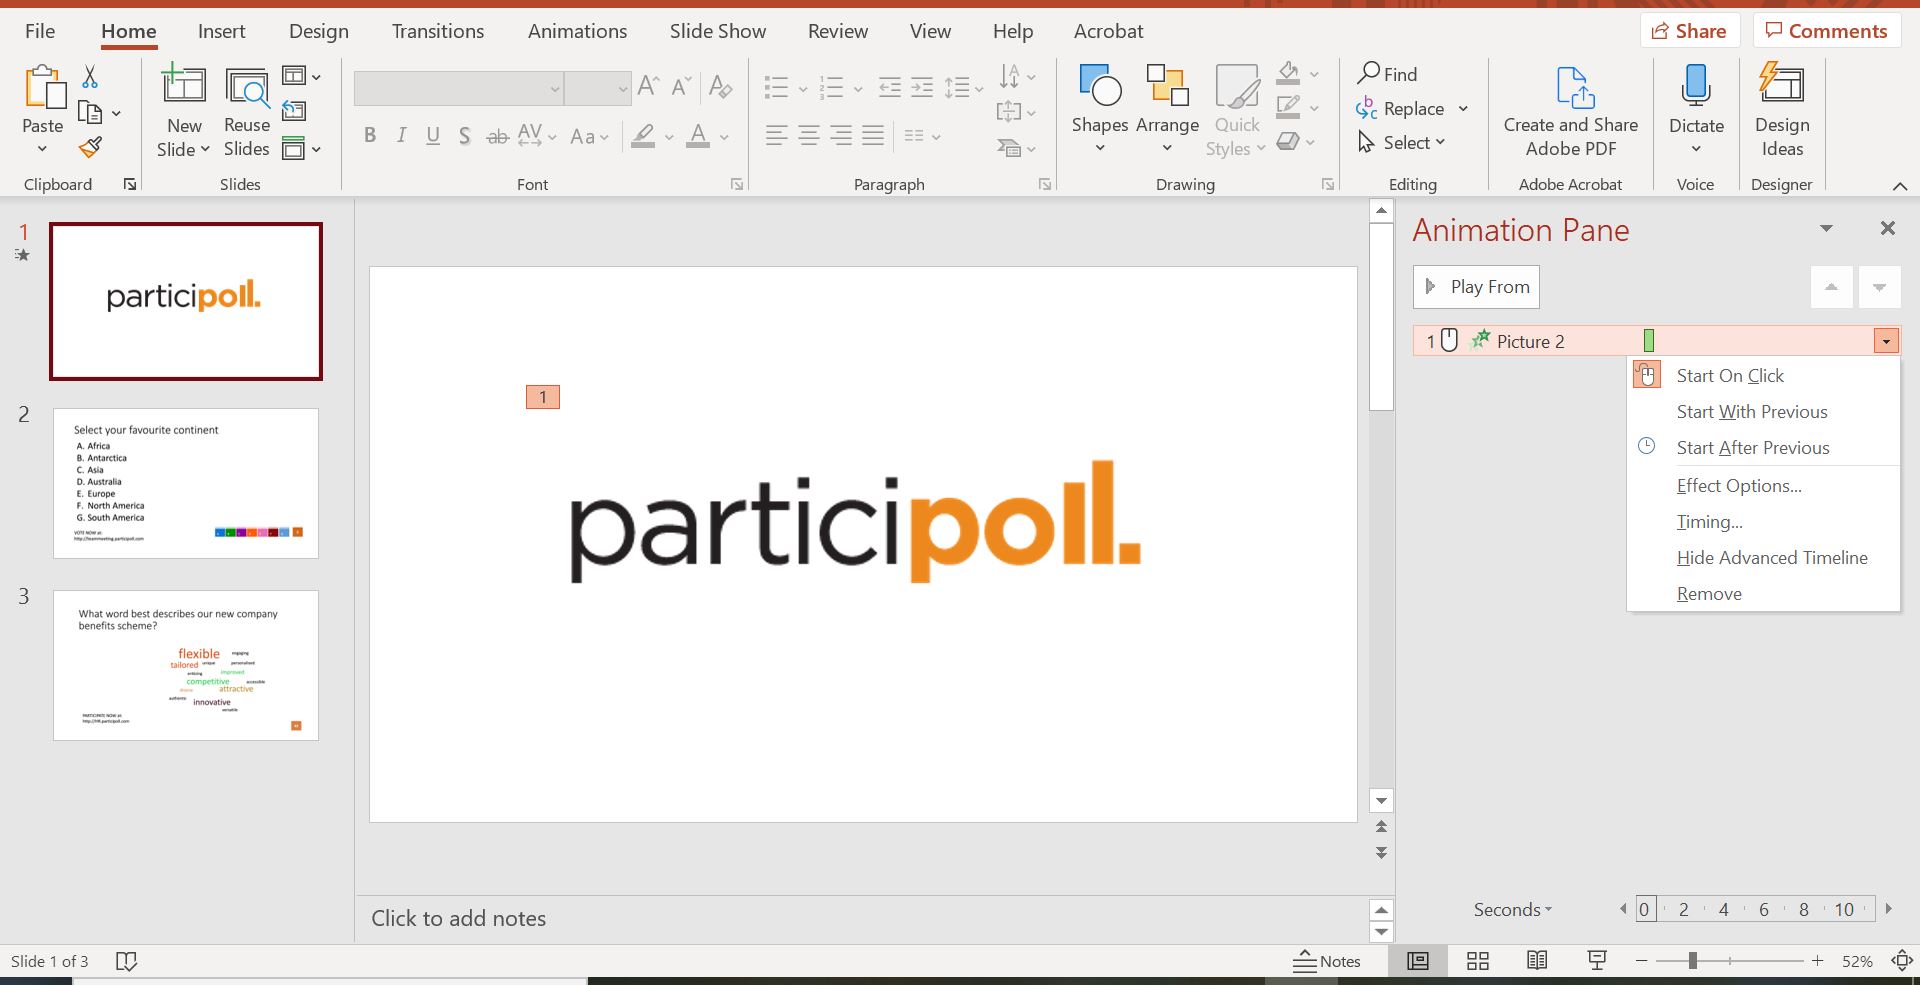
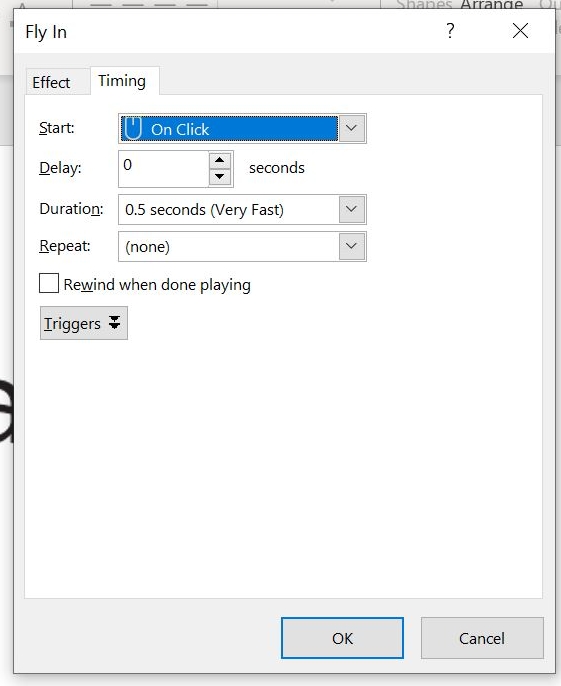
5. Then, you can control the timing of your animation and see effect options.
6. Finally, to see your animations in action, click the Play From button in the Animation Pane.

How to create animations in PowerPoint (Mac)
1. Select the object that you want to animate.
2. Next, click the Animations tab. This will show the animation options available for the object you’ve selected, including how you want it to appear on the slide, emphasis on the object (such as spin, transparency or teeter), and exit animations.
3. Hover over the animations section and click the down arrow to see more effects to choose from (shown in the screenshot below).
4. Click on your chosen animation to apply it to your selected object.
5. When you’ve applied your animation, a reference number will then appear next to your object – click this to show the animations panel on the right-hand side of your screen. You can use this to customise your animation.
You can also click the Animation Pane button.
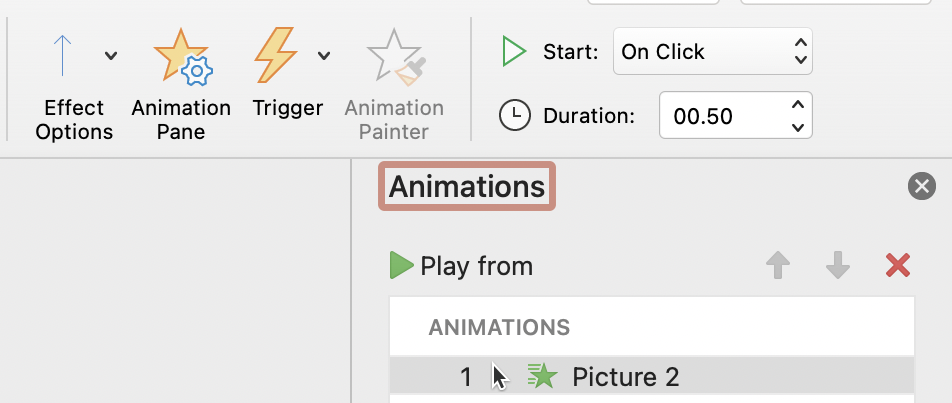
6. In the Play From tab, you can see which animation you have selected. If you have more than one animation applied to your object, you can reorder them here.
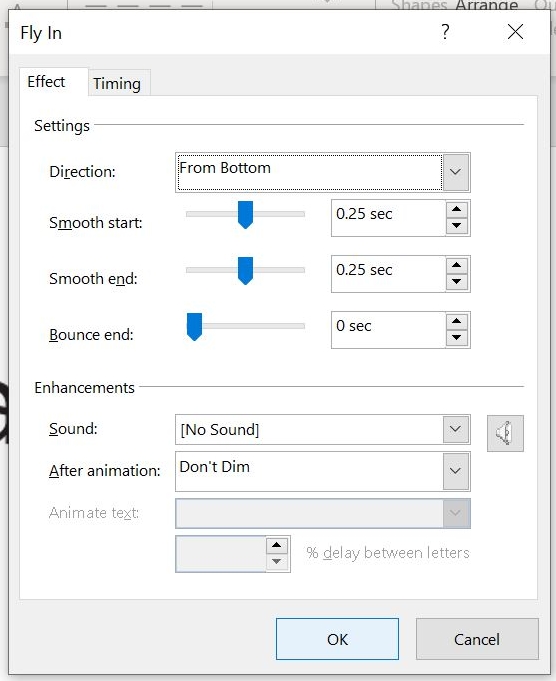
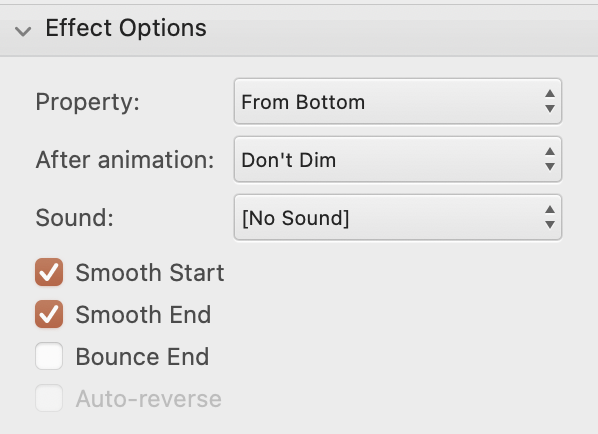
7. In the Effect Options tab, you can change where the animation begins (top, bottom, left, right, etc), what will happen at the end of the animation and also choose a sound to play.
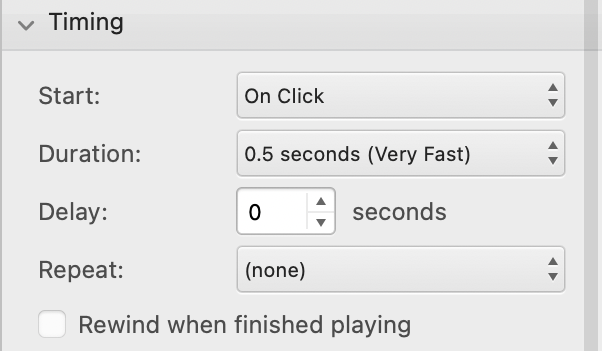
8. The next tab is Timing, which does exactly what it says on the tin. You can choose when you want your animation to start (on click, with previous or after previous), the duration of the animation, add a delay and choose whether you want the animation to repeat.
That’s how to create animations in Microsoft PowerPoint using both Windows and Mac devices in Microsoft 365. To continue to engage your audience, you can use Participoll to find out what your audience really thinks.
Read our how to guide to find out more.
