How to Capture and Insert a Screen Recording Video into your PowerPoint Presentation Slides
The latest version of PowerPoint comes with a little-known but cool tool that let’s you record a screen capture video session on your computer and embed that as a video in a presentation slide. It’s like PowerPoint contains it’s own video recorder which can capture video and audio from any activity you might make on your computer.
Confusingly, this is *not* capturing a recording of your actual presentation (something which PowerPoint is also capable of.)
view more for more information related to computer technology. It can capture across more than one application in a single session and you can even get it to capture part of a playing YouTube video, although there are better methods of embedding a full YouTube of Vimeo video.
This is a really useful function if you want to capture and embed a demonstration or how-to guide for other applications on your computer. Once embedded, the resulting video remains as a permanent MP4 video within your presentation just like any other.
Here’s how you create and embed a captured video….
1. It helps to cue-up the application(s) you want to capture so that you don’t have to go hunting for them once you start your recording (although the Windows toolbar still functions if you do need to change application mid-recording)
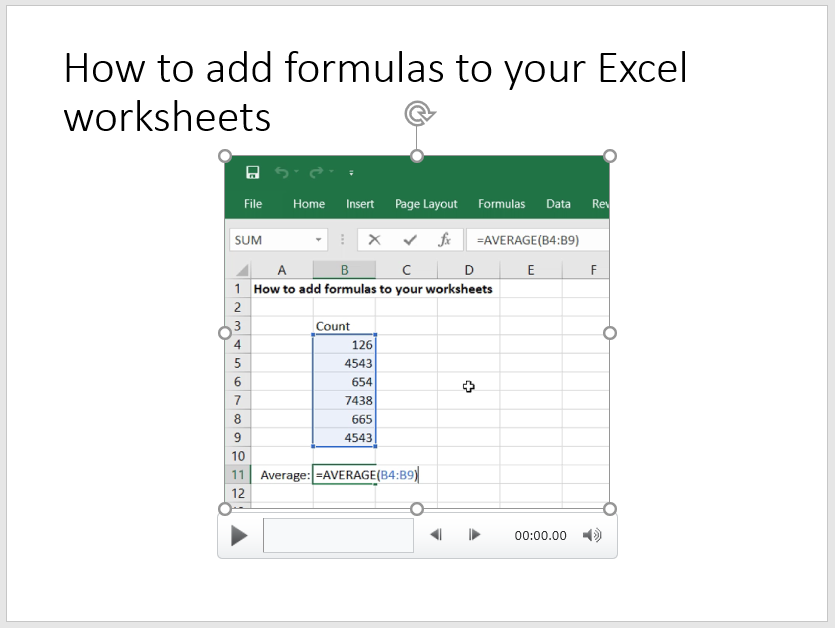
2. In PowerPoint, navigate to the slide where you wish to embed your video capture, go to the Insert menu and press “Screen Recording”.
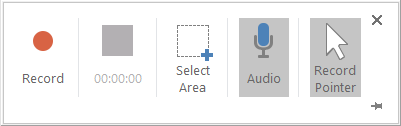
3. PowerPoint will immediately minimise at this point, giving way to whatever other applications you have running on your computer. You will see a video control toolbar floating near the top of your screen with stop, start, area select, audio recording toggle and mouse pointer capture toggle.
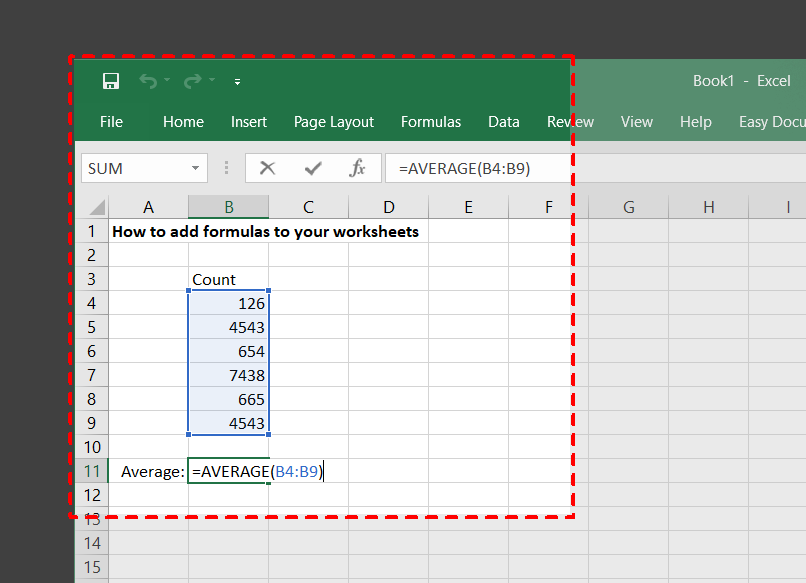
4. Before you start to record, you need to decide upon the area of your screen you wish to have captured within your video. Click the “Select Area” button and frame the part of the screen you want. You can select the whole screen if you want but we’d recommend using a smaller area if possible as it lets you neatly crop down to just the action that matters. Recording full screen or larger areas may make for an excessive presentation file size and a potentially ungainly embedded video which may be harder to view if you have to resize it down to fit in your PowerPoint slide.
5. Before you start recording you can choose whether to include audio and also the movements of your mouse pointer in the video using the simple toggle buttons on the control toolbar.
6. Once you’re ready to start recording, pressing the Record button will give you a three-second countdown before it starts
7. When recording begins, your control toolbar disappears which can be a bit disconcerting if you decide you want to abort. You can however stop recording immediately by pressing the fairly unmemorable combination of Windows button + Shift + Q.
8. You can also recover the control toolbar by moving your mouse point to the top edge of your screen. This has the added advantage of giving you the ability to pause recording rather than stopping it – handy if you need to launch another application or take a breather mid-recording. Note that if you’re doing a full screen recording and bring back the control toolbar, it will appear in your resulting recording.
9. Once you’re done, pressing the Stop button will immediately end the recording and embed it into your current PowerPoint slide ready to be used. You can resize it, frame it, format it using all the normal tools associated with embedding videos.