How to Draw in Microsoft PowerPoint
Drawing is a useful feature in Microsoft PowerPoint. You can use it to highlight important information or get creative to show your ideas in your presentation. It may seem tricky at first but PowerPoint has useful features to help you along the way.
You may find drawing in PowerPoint easier if you’re using a tablet or mobile device, but you can still use this feature in the PowerPoint web and desktop applications with your mouse or trackpad.

How to draw when creating a PowerPoint presentation (Mac)
1. Open Microsoft PowerPoint.
2. Open a previously saved presentation or a new one by clicking File > Open or File > New.
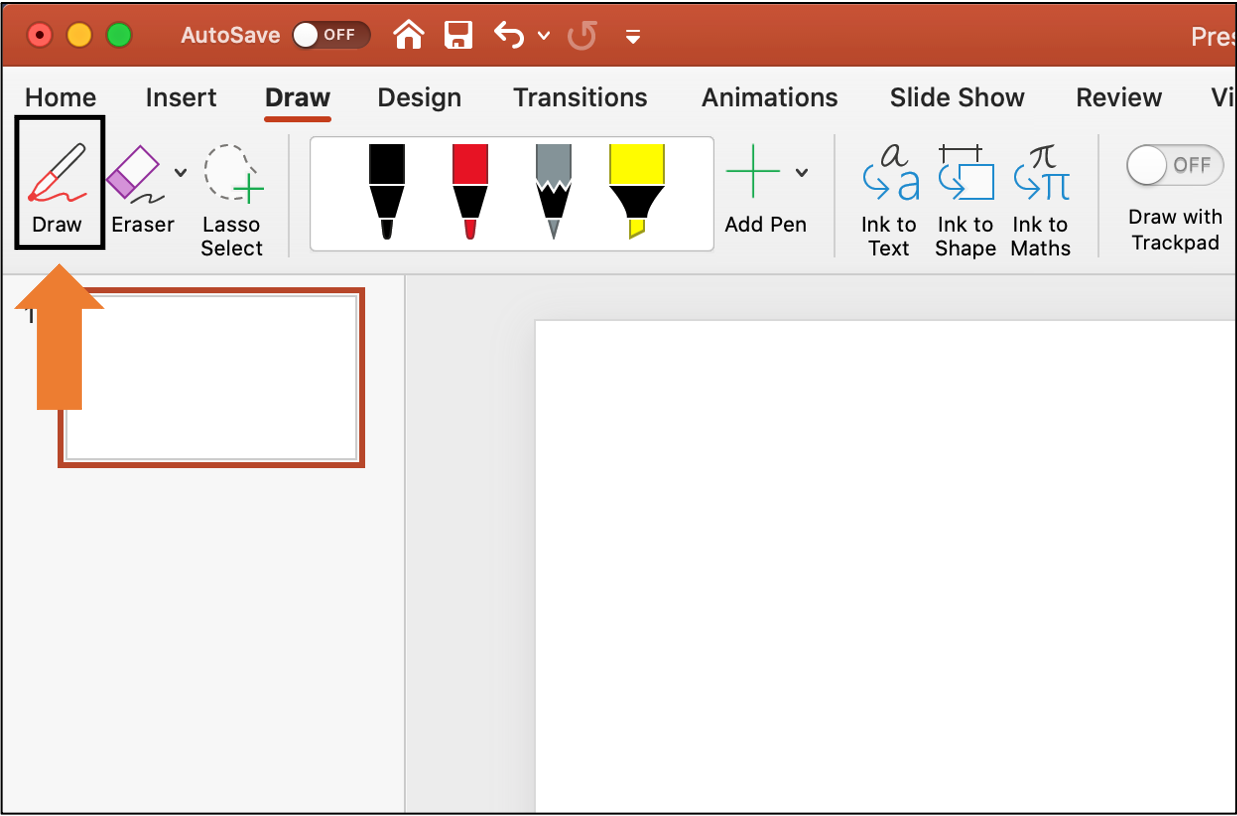
3. Click on the Draw tab and then Draw – you are now in Draw Mode and ready to get creating!
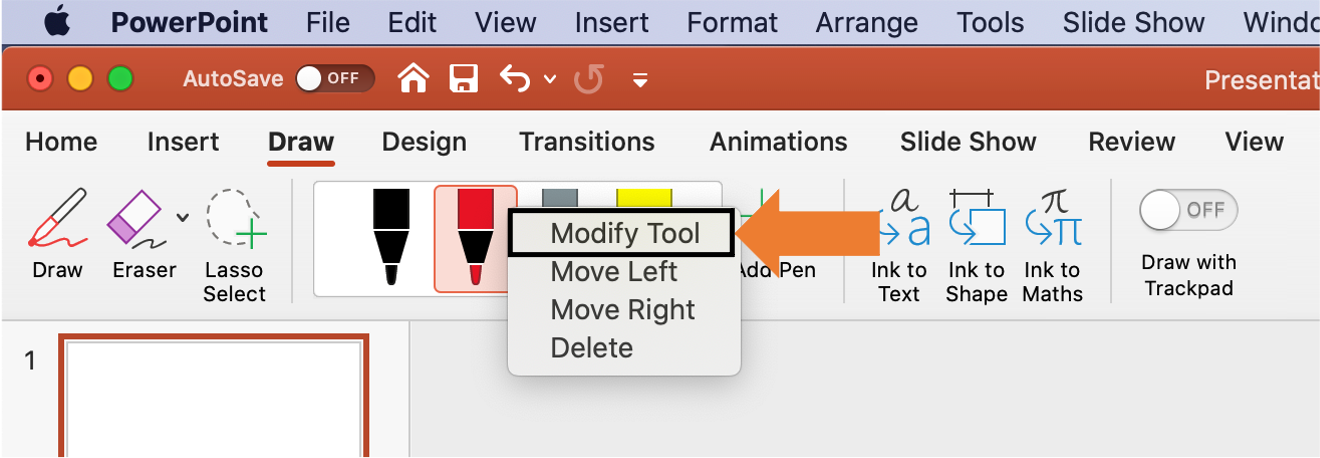
4. Click on your drawing tool of choice. This could be a pen, pencil or highlighter. You can also right-click, on each drawing tool and then select Modify to see more options.
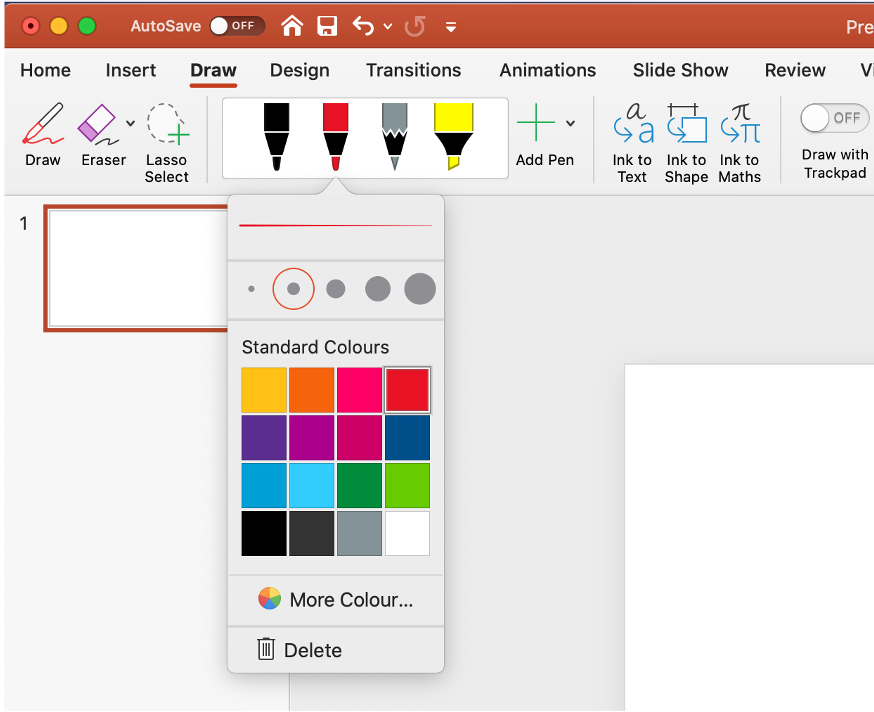
This will open the options to modify the drawing tool, such as the brush size and colours, and an option to delete your drawing. You can also select More Colour… to choose from a colour wheel for even more colours.
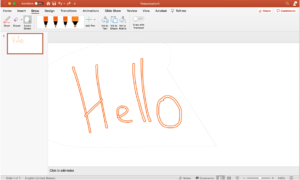
5. When you’ve selected your drawing tool, using a laptop or computer, click and move the mouse at the same time to draw on your slide. On a tablet or mobile device, you can use the touch screen to draw with your hand. This is what each tool looks like on a slide:

6. If you’re using a trackpad, Microsoft PowerPoint has a feature called ‘Draw with Trackpad’ which allows you to draw without clicking at the same time. To activate this, toggle it ‘on’ in the Draw banner on the right-hand side.
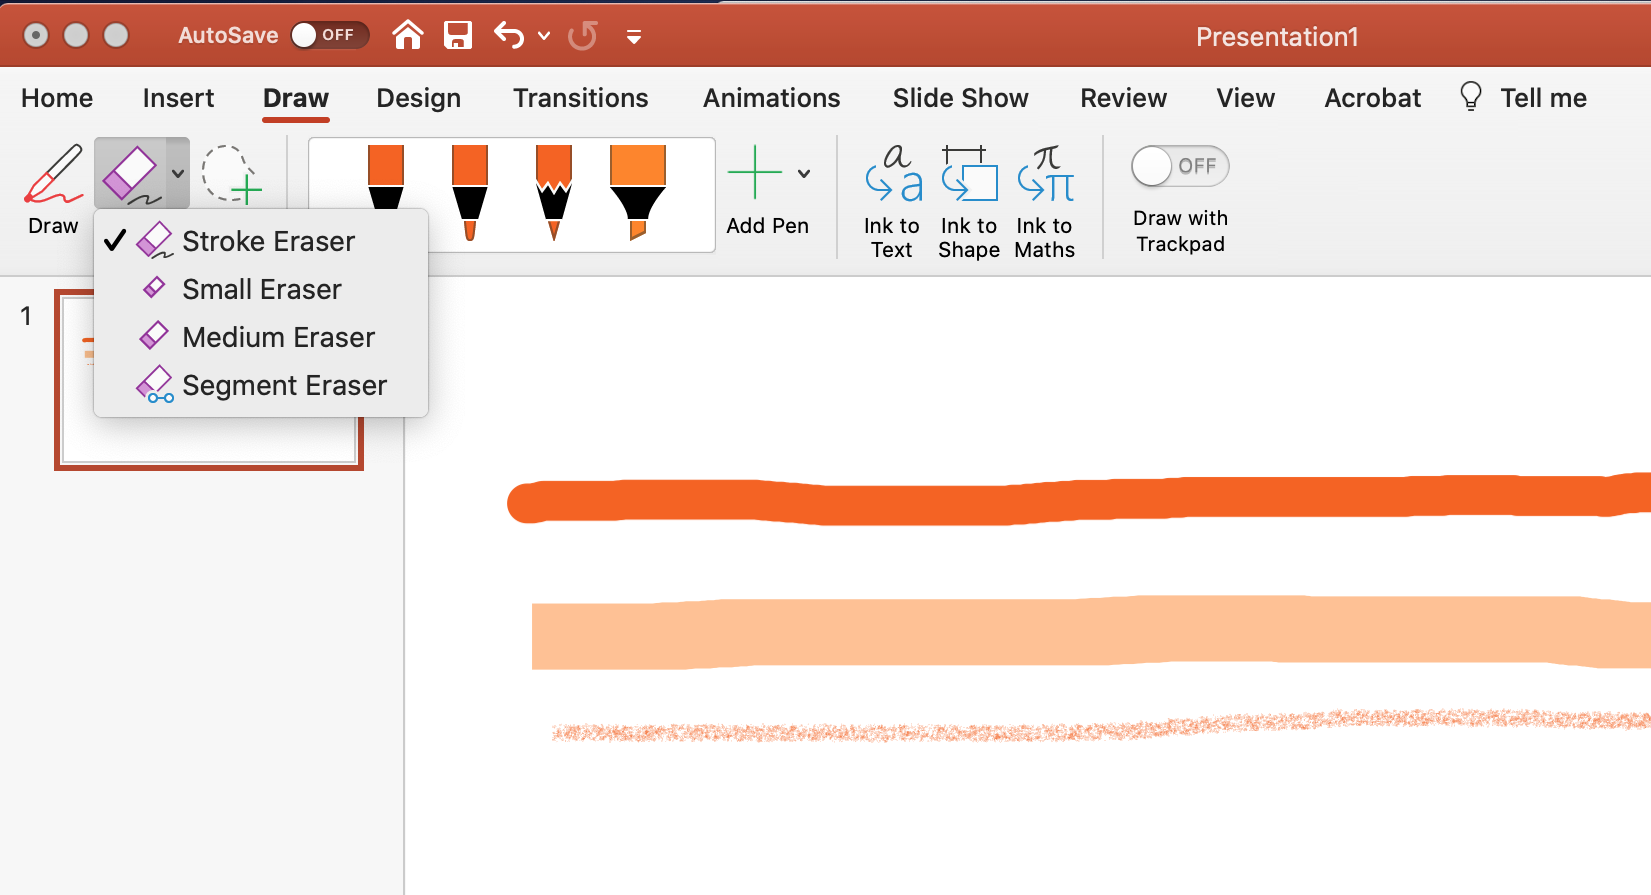
7. To erase your drawing, click the Erase tool in the Draw tab. Click the small down arrow to see Eraser options. Of course, you can always use the helpful Ctrl + Z (PC) or Cmd + Z (macOS) keyboard shortcut to save time. To learn more Microsoft PowerPoint keyboard shortcuts click here to download our free printable.
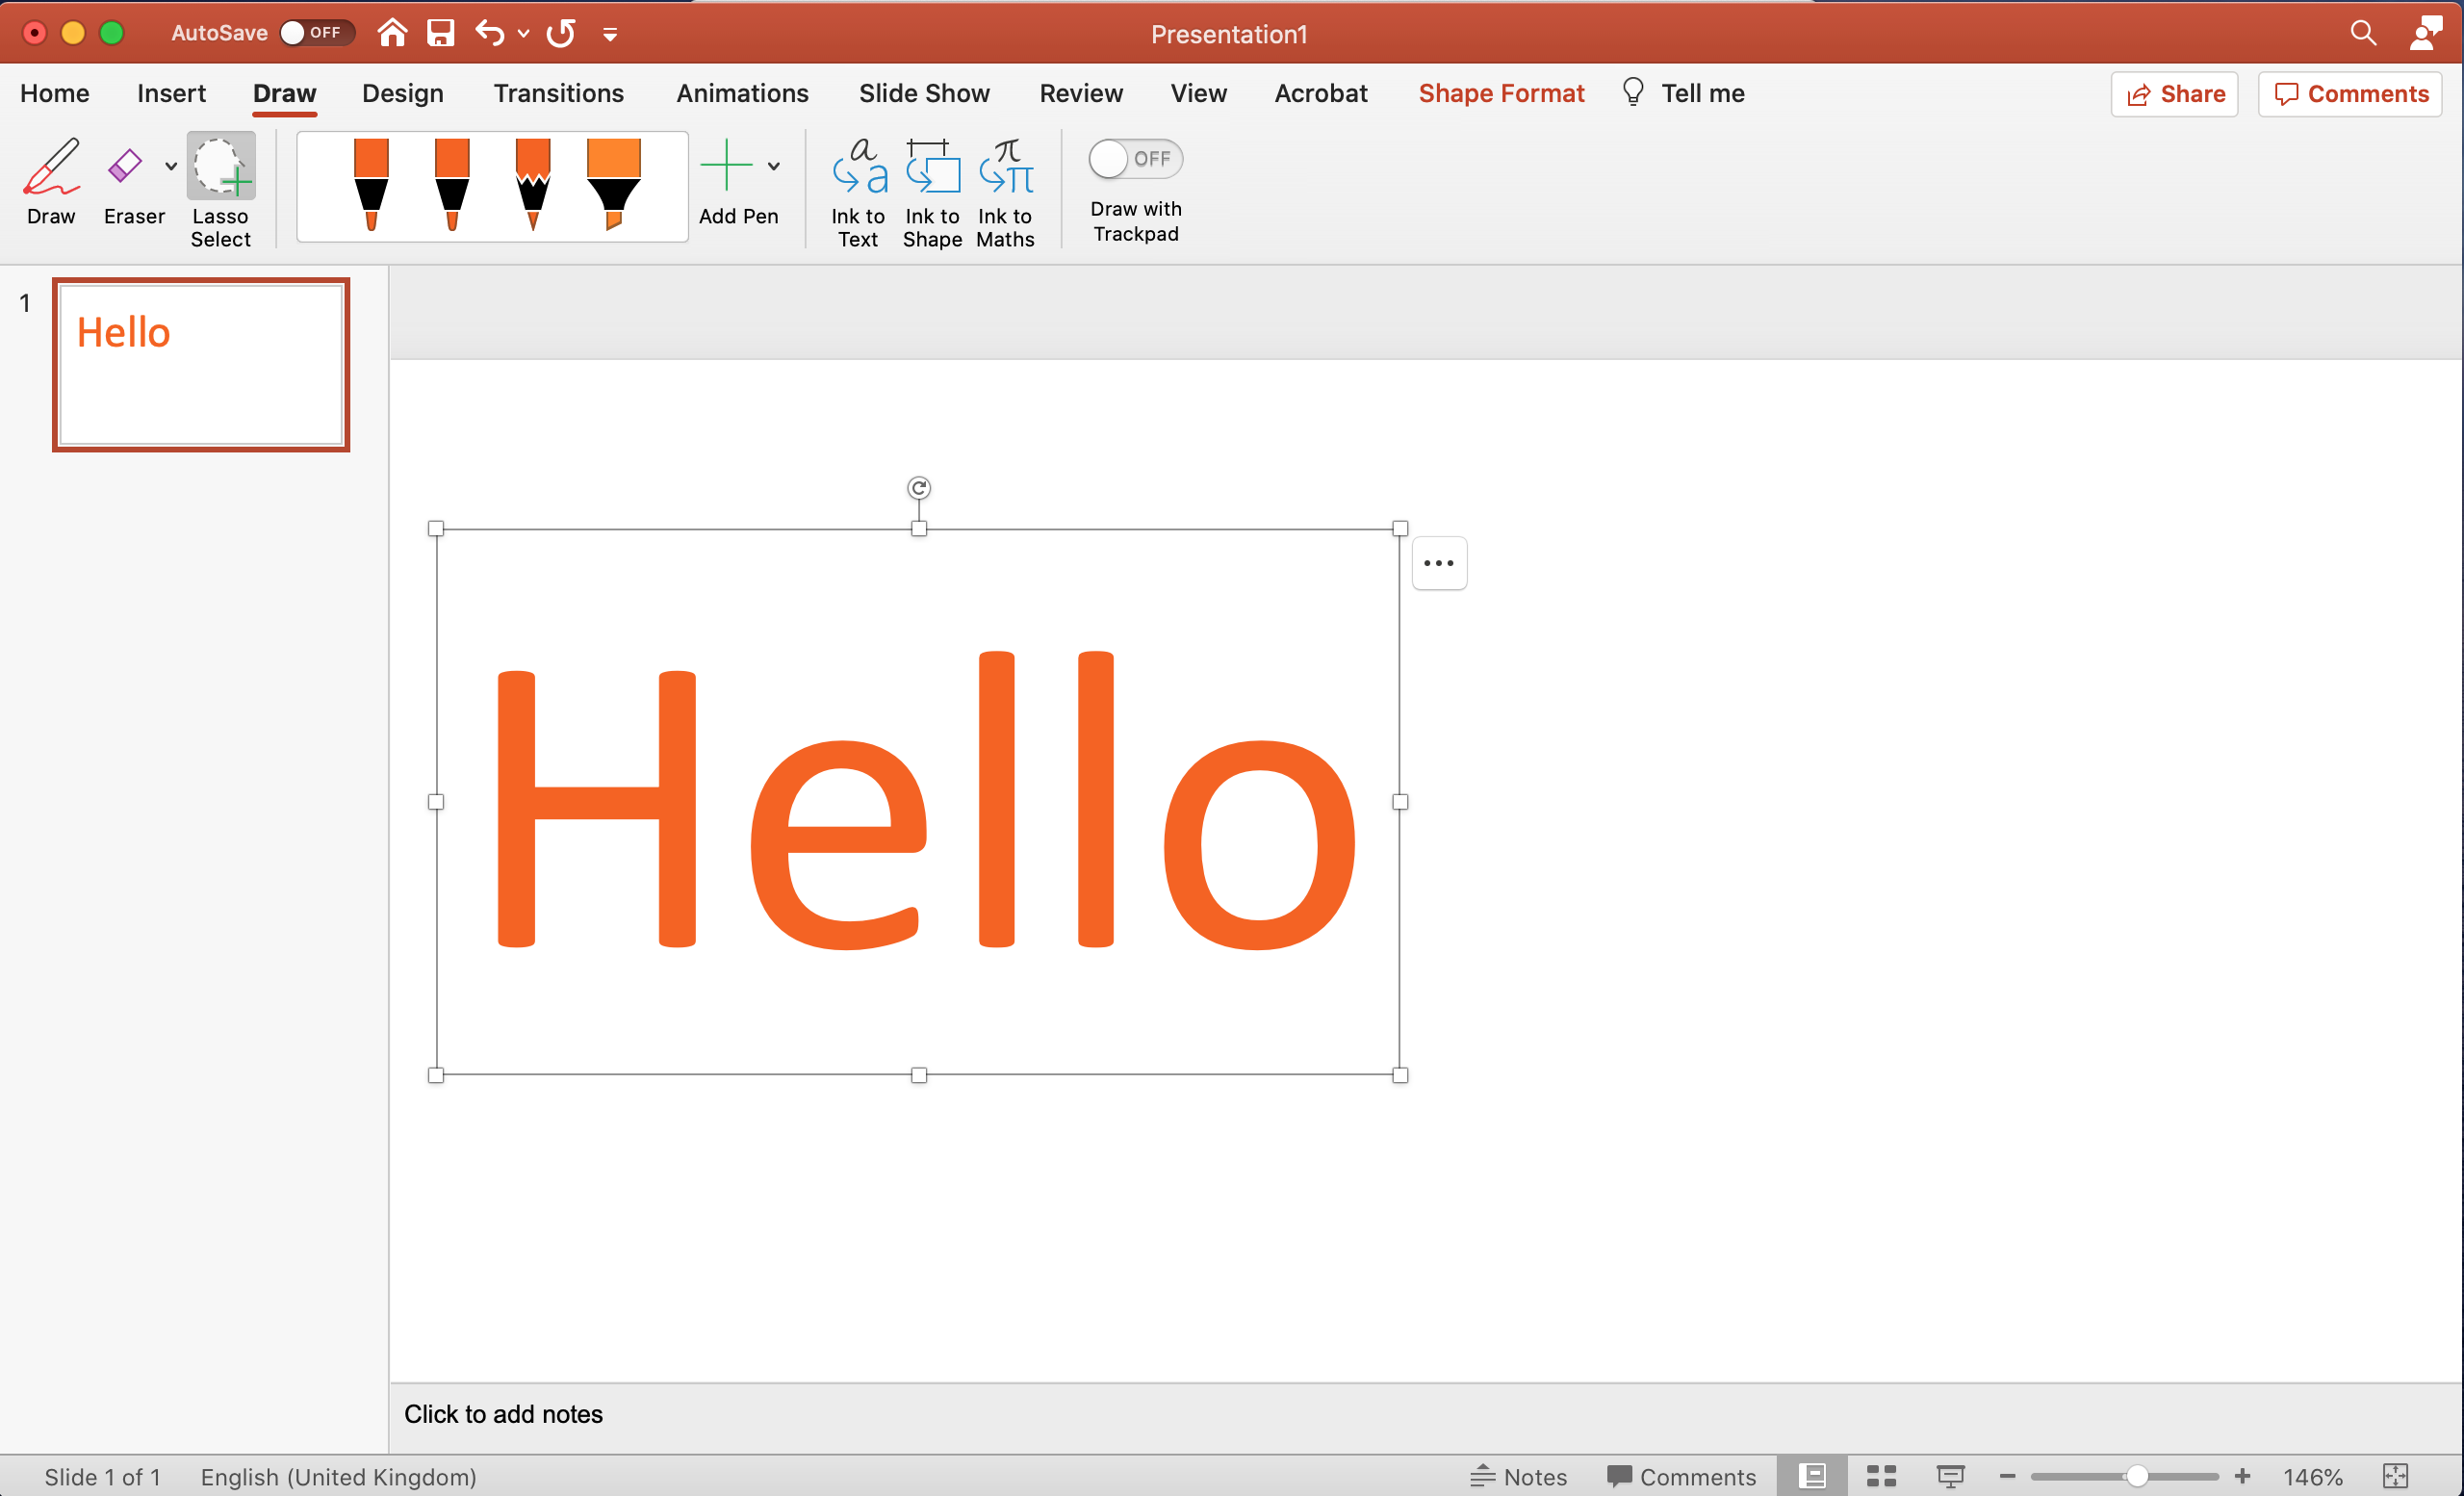
8. A feature we think is brilliant in PowerPoint Draw Mode is Ink to Text. Using the Draw tool, write a sentence or word that you want to convert to text. We’ve written ‘hello’. Next, click the Lasso Select tool and click and drag the lasso on your slide to highlight the handwritten text.
With your text selected, click the Ink to Text button. As you can see below, the drawing has turned into text which can now be edited using your keyboard.
The Ink to Shape and Ink to Maths features work in the same way, try it and let us know how you get on. You need to draw your shape or maths equation, select it using the Lasso Select tool, and then click the relevant Ink to Shape or Ink to Maths button.
How to draw when creating a PowerPoint presentation (PC)
1. Open Microsoft PowerPoint.
2. Open a previously saved presentation or a new one by clicking File > Open or File > New.
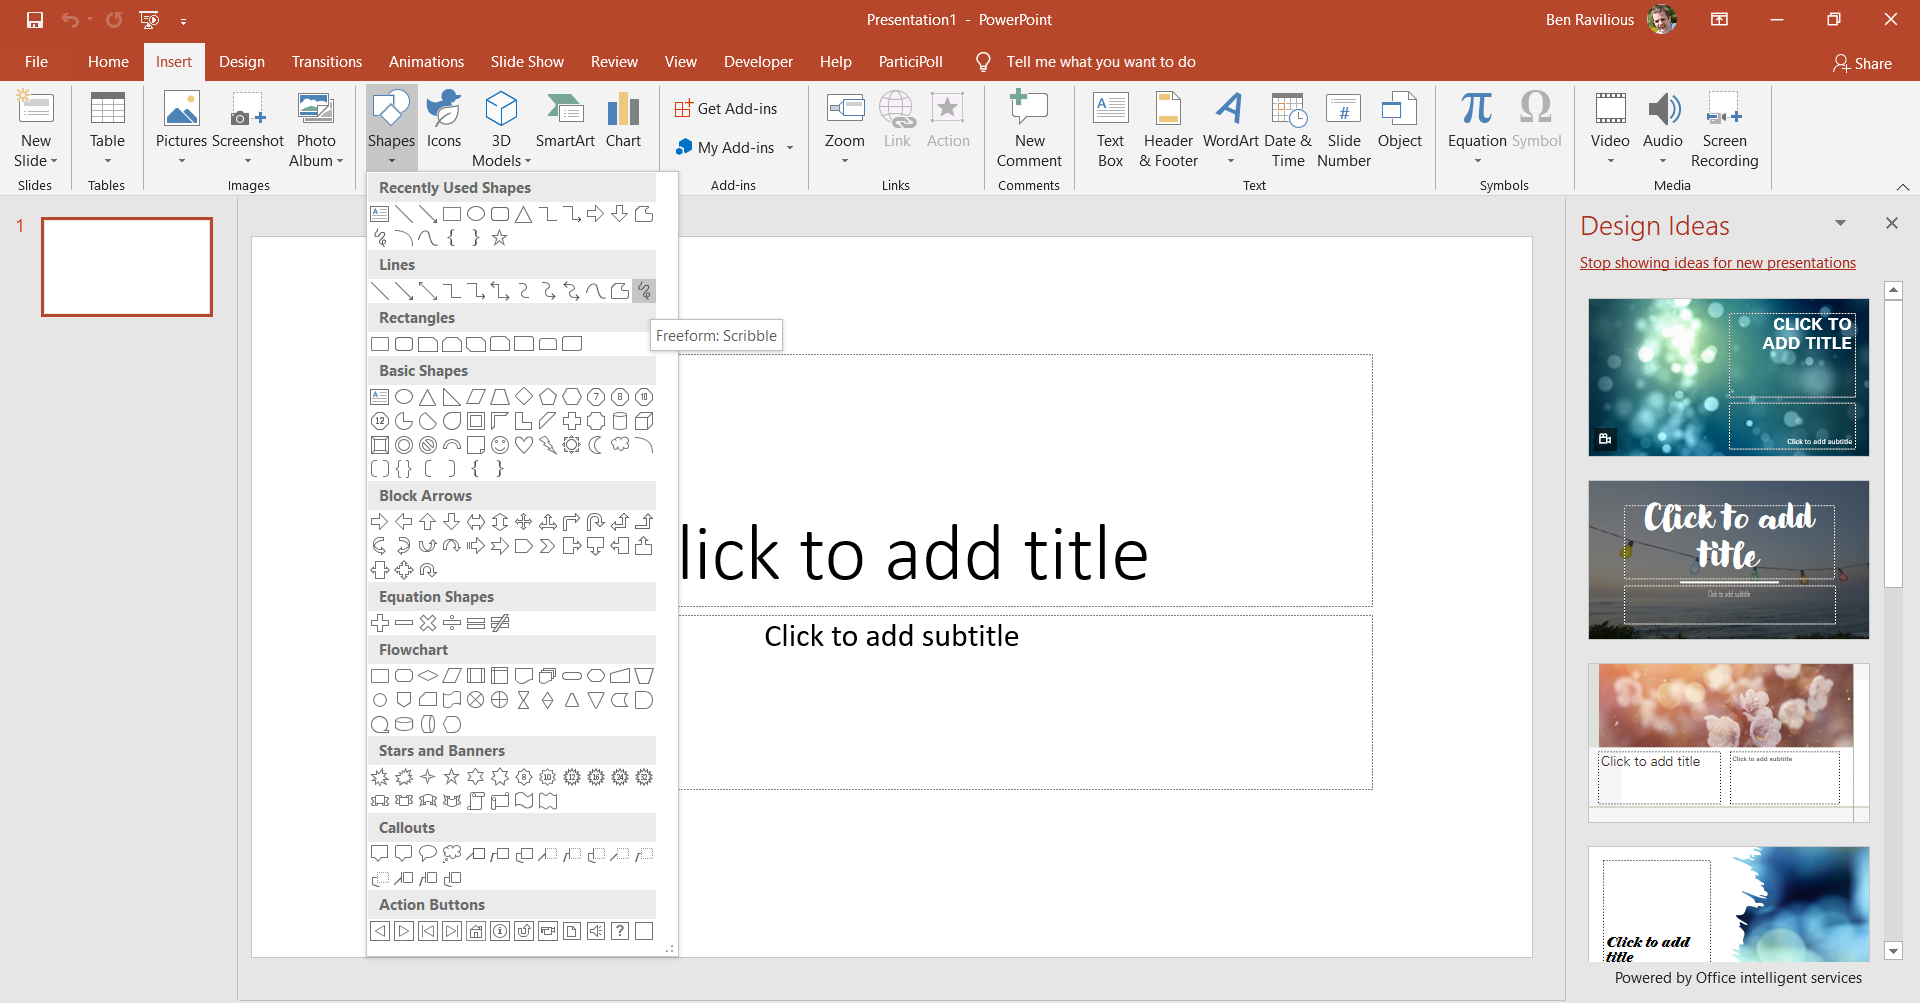
3. Click on the Insert tab and then Shapes. This will open a menu with many shapes for you to choose from to draw. To draw freehand, select the Freeform: Scribble tool (below).
4. Once you have activated this tool, a Format tab will appear. Click this to format your drawing and change things such as the colour and thickness of the line.
5. Click and drag your mouse across the slide to draw.
We’d love to see the creations you make when using the drawing tools in Microsoft PowerPoint. Tag us in your social media posts using @Participoll.
If you want to learn more about drawing in PowerPoint, you can find out how to draw on slides during a presentation here.

